I have used red henna for years to cover my greys and add a warm copper shine to my hair and often experimented with adding different ingredients to change or enhance the colour. I love henna as it enriches and thickens the hair, and the greys become quite shiny red, almost like tinsel, in the summer! The more greys you have, the more highlights! As it fades naturally between applications, the roots are slightly less noticeable. I henna my hair approximately once per month. As it works by staining the hair and is completely natural, there is no chemical build up or hair damage!
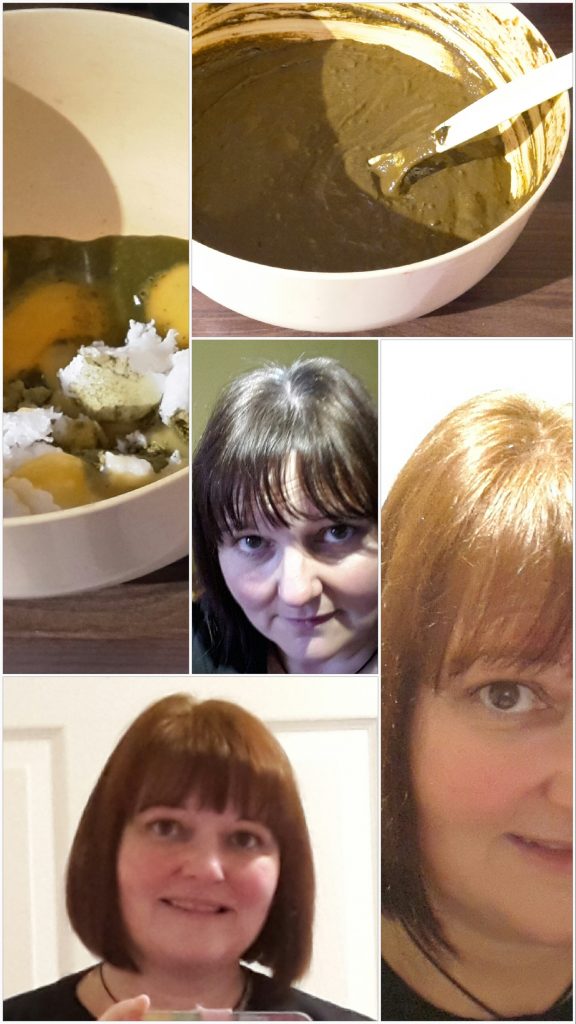
Here is a recipe I created to condition my hair as well as cover the grey roots, based upon tips and info I have picked up over the years. It worked really well – and here is the result! The centre photo is ‘before’ the bottom photo is after, the photo to the right is stood directly under the light!
RECIPE USED (AS IN PICTURE)
2 raw beetroots
approx. 120g red henna
1 heaped tablespoon black henna (indigo)
3 egg yolks
3 tablespoons organic virgin coconut oil
1 tablespoon ground coffee
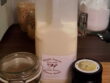
Boiling water
METHOD
Put both hennas, egg yolks and coco oil in a non-metallic bowl
Make a small strong coffee with the boiled water and coffee (filter out the grounds)
Cut the beetroots into large chunks and boil them in water for 10-15 minutes to release their colouring.
Add the coffee into the bowl, and slowly add the beetroot water, mixing until you get a smooth paste. Not too runny as it will drip off your hair – it is messy enough 🙂
Now either:
cover with cling film, pressing down around the henna mix so there is no air in contact with it. Leave for 6 hours or so in a warm place such as an airing cupboard.
OR
use it as soon as it has cooled enough to not scald your head!
APPLY IT TO YOUR HEAD – before you use it, protect all your clothes, put down an old towel or newspapers on the floor, where gloves, apply some palm wax or vaseline around your hairline to prevent it staining your head. I find it easier to wear a surgical glove to scoop it up and smear it on my hair – it’s like spreading a cowpat on your head!
Wipe off any that may be on your skin before it stains. Cover with cling film or a carrier bag (looks lovely!) and leave for as long as you like. If you chose to leave the mix to ‘develop’ then you can heat it back up briefly with a hairdryer or wrap in a warm towel.
Leave for 1-6 hours. I left mine for about 3-4 hours (I don’t time it per se, I just carry on with my day and wash off when it is convenient!)
It is often said to not shampoo afterwards. I usually use a gentle organic shampoo to wash out the henna as it doesn’t rinse out completely without it. I usually find without the coco oil and egg that it dries the hair quite a bit so I used to use a good dollop of conditioner, but with the addition of the egg and oil, it felt so much better and didn’t need conditioner.
HERE ARE SOME OTHER INGREDIENTS I HAVE TRIED:
These only vary the colour very slightly, but worth mentioning (use the recipe above without the beetroot or coffee, then add a combination from below)
Rooibos tea – brewing some rooibos tea and using this to mix enhances the redness a little
Black tea – brewing some normal black tea and using this to mix can deepen the colour a little
Lemon essential oil / juice – this helps to lighten the result, especially nice in summer for encouraging some natural highlights. If using essential oil, just put 5-6 drops in, or if juice, the juice of 1 lemon
Coffee – gives a deep browner hue (enhances the copper a little rather than red)
Beetroot juice/water – didn’t really enhance the redness as much as I thought it would!
Good luck – and please be aware that colour may vary depending on your hair type! Henna is permanent although it will fade over time. It is a progressive colour and therefore can take a few applications to make a big difference, but likewise, if your hair is lighter it can have quite a dramatic effect!
For Black, Red & Neutral Henna, and Organic Virgin Coconut Oil mentioned, I use Holistic Valley from ShopHolistic.com