NOTE (update Sept ’24): I have sourced some excellent quality double-terminated quartz points and can supply latex tubing. They are available at Shop Holistic here: https://www.shopholistic.com/crystals/orgone-energy-and-crystal-devices
This article has been featured by No-dig gardener Charles Dowding on Richard Vobes show HERE (towards the end of the show)
Chembusters are also known as Orgone Energy Generators. They can purify the air from environmental radiation, dissipate chemtrails and bring balance back into your environment. 
When making a chembuster you are creating a powerful energy tool and you therefore must respect the energies and power of the components, especially the crystals. Intent is also a very strong energy, so it is important that while making your chembuster you are intending that it will cleanse the air, bring back the natural balance and not interfere with the natural weather patterns.
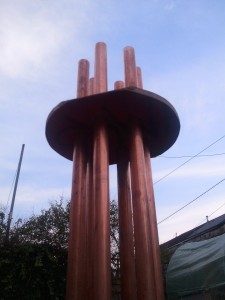
The Chembuster to the right was made in September 2011. Since then we have witnessed (and videoed) chemtrails in the sky quickly dissipating, all starting and stopping in the same place. It is stated in various places on the internet that a chembuster of this size (1.5m high) can purify a diameter of 45 miles. I am not sure about this as we can see the chemtrails in the distance, but maybe as the energy is directed upwards, the horizontal diameter may be much less.
The chembuster cost us approximately £120. Some of the materials were scrounged, some bought. I have detailed where we obtained the materials and how much they were whenever possible!
You will need:
3 x 3m lengths 1inch copper pipe
from Travis Perkins or any plumbing warehouse approx £20 each
6 x Copper end pieces
as above about £3 each
6 x double terminated rock quartz points, approx 2 inches long 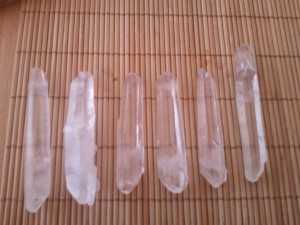 (they need to fit inside the copper pipe so less than 1inch thick)
We bought these from our crystal wholesaler, but are selling them now in sets of 6 from £5.00-£25.00 per set, see www.shopholistic.com)
A 5-Litre or similar sized bucket or plant pot (preferably not tapering as this makes the chembuster unsteady)
Ours is recycled from our aromatherapy department in our shop.
Polyester Resin – enough to fill your chosen bucket/container
Cost approx £25 per 5L from fibreglassdirect.co.uk
Metal shavings (also known as Swarf)
We got some aluminium shavings free from a local double glazing factory, copper shavings from a metal fabricator, we also chopped up some copper wire, used staples from a new pack of staples, various scraps of screws, nails, bolts etc from our garage!
Spare hose or latex tubing
This we got from our shop – a spare enema pipe!
Various crystals/tumblestones of your choice (optional) – I have many crystals around the house so I walked through the house asking to be guided to whichever crystals wanted to go into the chembuster. Even though this is optional it is a very good idea in my opinion to have citrine which transmutes negative energy, and/or carnelian which cleanses surrounding crystals.
Some scrap mdf or wood to make supports for the pipes at the top and bottom (one will be buried in the resin)
______________________________________________________
OK so you have collected together the materials. This may take a while – it took us a couple of months especially for the metal shavings and filings.
______________________________________________________
HOW TO MAKE YOUR CHEMBUSTER
We followed some instructions on various websites and added our own slant. We have realised it is not an exact science, we were far too worried at first about doing it right, but we thought if we are going to do this we need to be more fluid and spiritual with it and it is working so we couldn’t have been wrong!
1. Cut the copper pipes in half so you have 6 x 1.5m pipes.
2. Make your pipe supports using a large drill for the holes.
Below is a rough sample template of the bottom pipe support, this needs to fit snuggly inside your bucket or plant pot about 3-4 inches from the bottom.
The top template would look exactly the same but without the cut-outs around the edge. Above is a picture of it in place (ours is flattened on 2 edges as it is a scrap piece of laminate flooring!)
Now to make the ‘power keg’ of the chembuster.
3. You need to find out which is the positive and negative 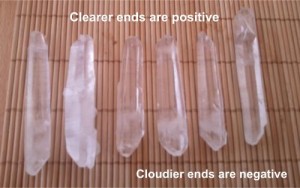 ends of the crystal points (sometimes called male and female). Basically one end will be clearer than the other. The clearer end is the positive and should be pointing up. This is the way the energy will flow. Before fitting your points you need to cleanse them by running them under water or blowing on them and intending any negative energy they hold is cleared.
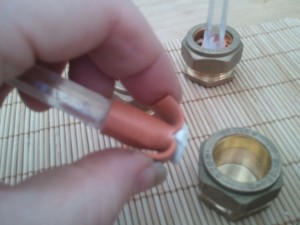
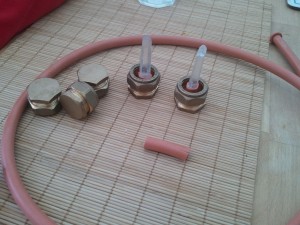
4. Cut an inch or so of the latex pipe or hose and put 2 slits in it half way down. This is going to secure the point inside the copper end cap. You can also use some blue tack. Here is how I did it:
and 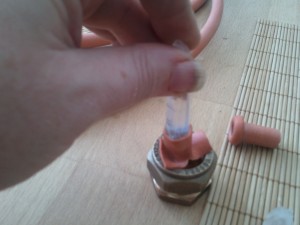 push into the end cap. push into the end cap.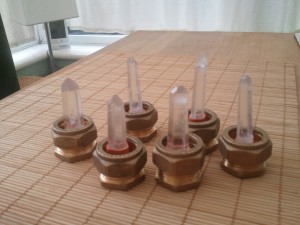 |
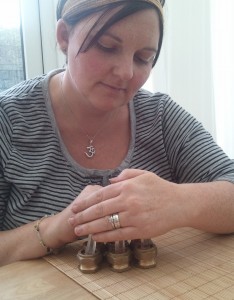 5. Once I fitted the crystals, I gave them Reiki Healing and held the intention that they clear our air of harmful toxins and return the natural weather. If you are unable to do Reiki, you can still give the crystals your love and appreciation while holding a similar intention. It is important to programme the crystals. Love and appreciation will help them to resonate at a higher vibration.
6. Now fit the copper pipes through the holes in your woo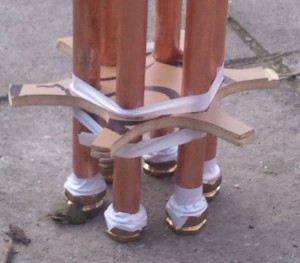 den supports and fix the end caps onto the bottom of the copper pipe lengths being careful not to dislodge the crystals. You can use some tape to hold them all in place for now, we used white insulation tape.
7. Now you are ready to mix your polyester resin with the catalyst. Be careful to take all the necessary precautions as advised on the tin and use the correct amount of catalyst. We made ours up in 2 parts to give us more time. Also the amount of heat generated by the resin as it is setting is unbelievable – the plastic tub could’ve easily melted if we had done it all in one go! If I did it again I would probably do it in 3 lots.
8. Put a layer of swarf in the bucket and place the chembuster pipes into the bucket. You can rem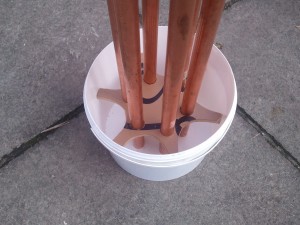 ove the tape if you wish, we removed most of it but it shouldn’t make any difference. (Please note the image is when we were putting the wood in with the pipes to make sure it all fitted OK, hence the lack of swarf!)
9. Pour in some of the resin, add some scoops of metal particles, crystals if using, more resin, more swarf, more crystals, etc until you have used up the resin. Wait until the first lot of resin has set until continuing with the next batch. This is where we went wrong – it was looking like it may rain so we did the next layer t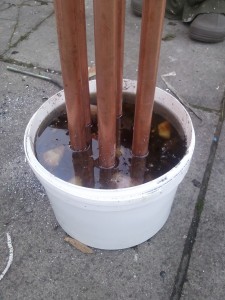 oo soon afterwards. This caused a lot of heat and the bottom of the bucket bulged so it is a bit wobbly!! Also the resin has since cracked in 2 places on the surface and some of the exposed metal is a little rusty within the cracks. But it still works!
We placed some larger tumblestones and points of citrine (clearing negative energies), amethyst (protection) and rose quartz (unconditional love) into the top layer of the chembuster. I used a dowsing pendulum to see where these crystals should be placed.
10. We collected some water bottle tops to place on the top of the pipes to prevent water collecting inside the pipes as this may freeze and smash the crystals inside. It is important you do not use anything that may interfere with the energy flow such as copper end caps. Plastic is fairly safe to use. We secured ours on with insulation tape. Not very attractive but practical!
Place your new Chembuster in your garden! You may want to put it out of sight of potential scrap metal collectors in case they think the copper pipes are for them! Some people bury the bottom in the earth but we put ours on the patio with a tree shrub next to it. It looks lovely a bit like a modern sculpture! We have enjoyed lovely skies since our chembuster has been in place. Some days it is more effective than others. Maybe this is due to different chemicals being sprayed. I also charge it up and cleanse it now and again with Reiki, but like I have already said, if you can’t do Reiki, do it with love.
 You can see where all the chemtrails are stopping at a similar place over the horizon, and then the sky is beautifully clear. This is now a typical image of our skies ever since we built our chembuster!
We are continuing to experiment with orgone energy generators. I have just made some individual pendants with aluminium swarf (as it is the prettiest and most sparkly!), and mixtures of different crystal chips in clear jewellery-quality resin. I have set these into different shape silicone moulds. They are intended to be little personal protectors. We also plan to make smaller chembusters for use in our campervan and offices. I will write more on these and add some pictures in due course.
I would like to add that I cannot be held responsible for anyone or anything that arises as a result of following these instructions. You must take care and treat all the materials with due respect. I cannot guarantee that a chembuster made to these specifications will work, I can only relay my own experience.

